* * HELP & MANUAL PREMIUM PACK 3 DEMO VERSION * *
This documentation was styled with a demo skin from the Premium Pack 3 add-on for Help & Manual. The contents of the skin are encrypted and not configurable.
This version is copyright and may only be used for local testing purposes. It may not be distributed.
Please purchase the full version of the Premium Pack to get the configurable skins and remove this notice.
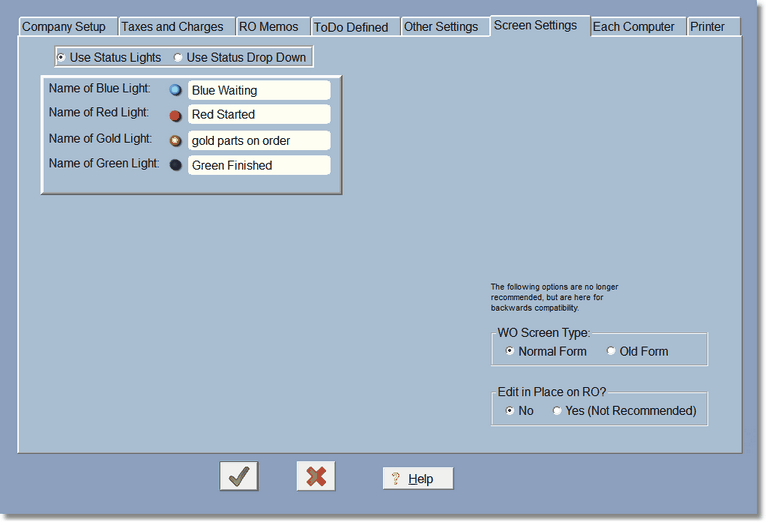
Status Table Setup
Set Status Values and Lights.
Each RO can have one status. There are 4 status lights maximum plus 1 light that indicates no status was selected at all. The 'C-All' (dull green light) is just a selector that lets the program show all statuses in the RO browse screen. If you only need the 4 statuses, then there is no need to fill this out, just use the status lights as they are. You can re-define what the status lights mean under the User Defined Options.
However, if you need more than 4 statuses, click on 'Use Status DropDown' so you can use the status table to create as many as you need (up to 36). To be compatible with the status lights, the letters C,W,P,S,F, and N have been reserved. C is to show all and you really shouldn't use it to set a status in an RO. N is No status and shows all the RO's that don't have a status selected (or have a status of 'N'.
W,P,S, and F can be set to anything. These correlate to the status lights.
If you choose any other character (numbers 0-9 and letters A-Z excluding the above letters), then the lights in the RO will be like you didn't select anything. We really didn't see the point in making 36 colored lights. The status description is what actually shows up for selection.
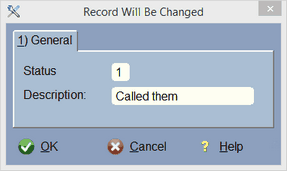
Note: Once you create statuses in this table you really don't want to change them because you will have selected them in the RO's. Changing them here make your RO's wrong!
You will choose the status on the Actual RO itself...
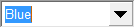
Just click on the Down Arrow and all the selections will display.
From the work order/RO table...
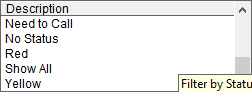
Remember, you define these status descriptions in the above status table.
Set Work Order Entry Form (WO Screen Type)
Digital Wrench has two kinds of work order forms for entering information. Setting this to Normal will use the newest form and make entry of your information as easy as possible. Setting this to Old Form will use the older work order form. This is basically here for backward compatibility for users that are used to this form.
However, we no longer support the old form and absolutely DO NOT RECOMMEND using it!
Edit in Place
Normally you will leave Edit in Place off. This allows you to edit line items in the RO right on the screen without a form. We built it, but not too many people use it, and that's fine. We recommend you leave it off.