|
<< Click to Display Table of Contents >> Screen Settings |
  
|
|
<< Click to Display Table of Contents >> Screen Settings |
|

UPC Buttons
The UPC Button will display at the bottom left of the RO screen just below where you would type in the part# or UPC#. If it is depressed, the program will search for the UPC, otherwise it will search for the Part#.
Scan UPC as default simply defaults the button to depressed so it will naturally search for the UPC. You can of course unPress it.
Scan UPC in POS as default does the same thing. The button always is displayed in the Point of Sale, so not option to NOT see it.
Part Screen Options
The Manufacturer field and Serial Number fields are not necessary for your parts, so if you don't need them, turn them off here.
RO Screen Options
Shipping and interest are only needed if you do shipping or charge interest on invoices that are not paid. These are on the right side of the RO screen.
Tabs

In the RO Screen, there are several tabs, parts for parts, labor for labor, etc. If you don't need one of these tabs, you can simply turn it off. Many don't need the picture tab for instance.
Below the line are the tabs at the top of the RO Screen. Simply uncheck the ones you don't need.
Status Lights
Each Estimate or RO can have a status light turned on. Each light is a different color. While we have defined what the lights are for, you might not like our light names, so you can now name the lights.
At the top of the RO screen there are 5 Status 'lights'. Each one has a different meaning. You can make up your own meanings, but here is what we define them as. You can turn on one light for each WIP or Estimate. It is simply a status. This let's you select and filter RO's with just that one status in the work order browse screen.
Dark Green: No Status
Blue: Waiting.
Yellow: Waiting on parts.
Red: Being worked on.
Green: Ready to go.
If you're ok with these, just leave the status names blank, otherwise type in your status meaning for each light color.
There is now an excluded Status that you can setup.
![]()
When on the RO table, you can click on the CheckMark to the right of the status lights and this color of light will be excluded from the list. You can also right click on one of the status lights and that one will become the excluded one while you're in that screen.
Status Table Setup
Set Status Values and Lights.

Each RO can have one status. There are 4 status lights maximum plus 1 light that indicates no status was selected at all. The 'C-All' (dull green light) is just a selector that lets the program show all statuses in the RO browse screen. If you only need the 4 statuses, then there is no need to fill this out, just use the status lights as they are (Above). You can re-define what the status lights mean under the User Defined Options.
However, if you need more than 4 statuses, click on 'Use Status DropDown' so you can use the status table to create as many as you need (up to 36). To be compatible with the status lights, the letters C,W,P,S,F, and N have been reserved. C is to show all and you really shouldn't use it to set a status in an RO. N is No status and shows all the RO's that don't have a status selected (or have a status of 'N'.)
W,P,S, and F can be set to anything. These correlate to the status lights.
If you choose any other character (numbers 0-9 and letters A-Z excluding the above letters), then the lights in the RO will be like you didn't select anything. We really didn't see the point in making 36 colored lights. ("Is that Pink or Salmon"?) The status description is what actually shows up for selection.
Note: Once you create statuses in this table you really don't want to change them because you will have selected them in the RO's. Changing them here make your RO's wrong!
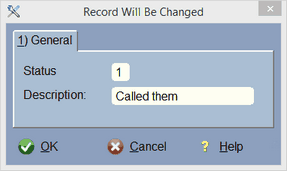
You will choose the status on the Actual RO itself...
![]()
Just click on the Down Arrow and all the selections will display.
From the work order/RO table...

Remember, you define these status descriptions in the above status table.
Set Work Order Entry Form (WO Screen Type)

Digital Wrench has two kinds of work order forms for entering information. Setting this to Normal will use the newest form and make entry of your information as easy as possible. Setting this to Old Form will use the older work order form. This is basically here for backward compatibility for users that are used to this form.
However, we no longer support the old form and absolutely DO NOT RECOMMEND using it!
Edit in Place
Normally you will leave Edit in Place off. This allows you to edit line items in the RO right on the screen without a form. We built it, but not too many people use it, and that's fine. We recommend you leave it off.