|
<< Click to Display Table of Contents >> Get Date Range |
  
|
|
<< Click to Display Table of Contents >> Get Date Range |
|
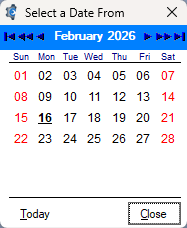
This screen shows up in many places, usually reports or filters on browses that let you select a date range.

You can put in a date range on this screen in many ways.
First, you can type in the From and To dates. Or you can click on the calendar icon next to the dates and a calendar will display so you can select a date from the calendar (by double clicking on the date).
You can also just click on one of the six options. It's like a wizard, it just fills in the dates for you, which you can modify. Today*, This Month*, This Year*, Forever, Today to Future, and Last Week*.
With the options Today, This Month, This Year, and Last Week, you'll notice they have an asterisk (*). This means that once you click on that option, you can then click on the left or right arrows at the bottom of the screen to increase or decrease the range. See the little asterisk * near the arrows.
For instance, if you click on This Month, then click the right arrow, it will change to next month, then to go to the next month, etc. You can only use the arrows if you select a date range option* first. Clicking OK will select that date range for the procedure that called this screen.
There is also a drop-down as noted with the blank, then the down arrow.
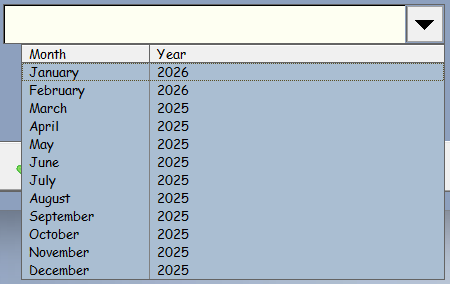
This give you the past year starting at this month. Handy dandy, right? You can also use the Arrows to go forward or backward month by month.
Also, notice at the top above the dates, the program gives you the day of week as well.
In some cases there will be a time range below. Click on the R button to show all time (12:00 am to 11:59pm).