* * HELP & MANUAL PREMIUM PACK 3 DEMO VERSION * *
This documentation was styled with a demo skin from the Premium Pack 3 add-on for Help & Manual. The contents of the skin are encrypted and not configurable.
This version is copyright and may only be used for local testing purposes. It may not be distributed.
Please purchase the full version of the Premium Pack to get the configurable skins and remove this notice.
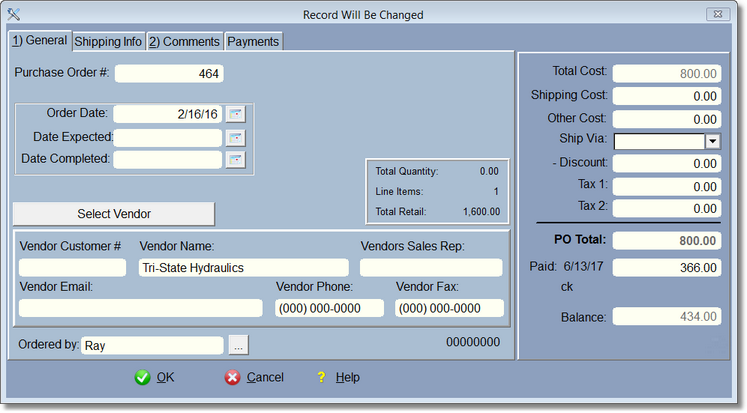
The Order date is brought in automatically when you first create a PO. This can be safely changed. You will be prompted for the Date Expected when you click on the Order All button on the main PO Screen.
Here is where you select the vendor for the PO. The shipping info is where you want it shipped. It is already filled out for you to ship to your company. Change this of course if you want it shipped somewhere else.
If you choose, you can track payments you've made on this PO. The easiest way is to click on the $ on the previous screen. However, you can click on the Payments Tab and enter a payment. The PO will recalculate to reflect any payment additions, deletions, or changes.